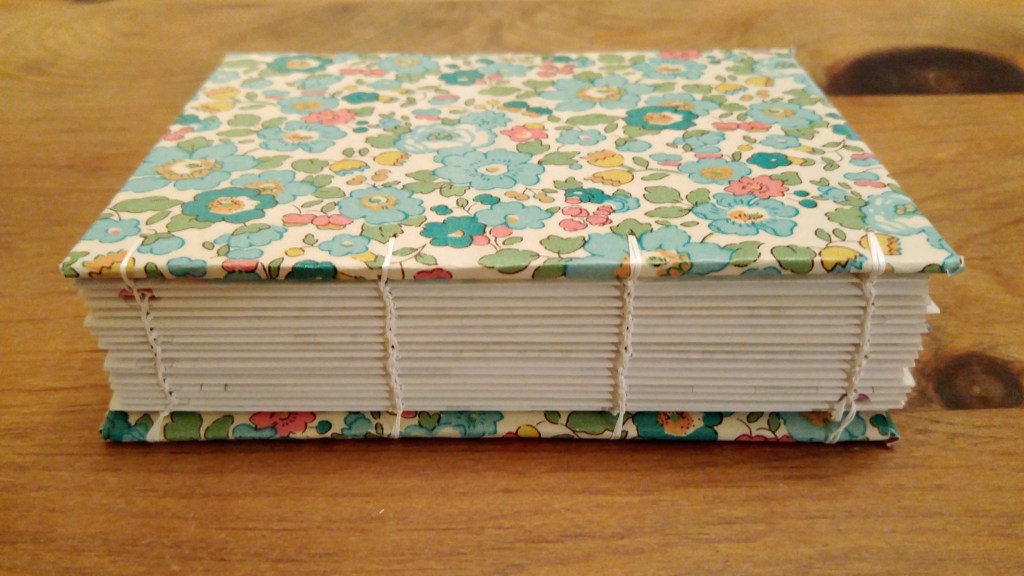
I’ve had bookbinding on my mind for about a year. It ticks off all the things that always turn me onto a craft: it uses up things that might otherwise be discarded (paper scraps), it involves a certain amount of precision and skill, and it results in a wholly new, totally practical item.
So I fired up Periscope yesterday and made my first handmade book. (Well, I did a bunch of prep work, then fired up Periscope and started making a book, then I finished making the book later. Making a book takes a lot of time.)


Notes from a First-time Bookbinder
Though every bookbinding tutorial I found lists very specific materials required to make a book, I had no trouble making do with what I had at home (see details below in the Scope Notes). So keep that in mind if you’ve been holding off trying this out because you don’t have certain items.
Also, this is not a quick project. All told, I probably spent about three hours making this book yesterday. It’ll probably take less time to make my next book, but maybe consider this a weekend project rather than an in-one-sitting project if it’s your first time.
Scope Notes
Lots of notes about this project! First, about the tools and materials (some of these are affiliate links):
- For the front and back covers of my book, I used pieces of corrugated cardboard I cut down from a shipping box then covered with decorative paper. The paper is from the inside covers of an issue of Mollie Makes magazine (which often includes gorgeous full-page prints in its pages). You can also use bookboard, heavy cardboard or chipboard for book covers.
- For paper, I used scraps, all cut roughly to the same size (half of an 8.5″ x 11″ paper, so 8.5″ x 5.5″ – folded in half, as they are to make a book, each page I made is roughly 4.25″ x 5.5″).
- Every tutorial I found called for a bone folder. I’m pretty sure I have one somewhere, but in the interest of actually doing this project, I just used the side of a pencil shaft to make a good crease in my folded papers.
- I used a tailor’s awl to punch holes in my papers and covers, because that’s what I had on hand. In the interest of keeping my fabric- and paper-cutting tools separate, I’ll probably pick up an awl like this one for bookbinding.
- Most bookbinders use waxed linen thread to sew their books together. I didn’t have any, so I used dental floss. Minty fresh!
- I used a sharp tapestry needle for sewing. It worked great, but many people who sew the sort of binding I made prefer to use a curved needle.
- If I end up really getting into this and use very tough materials for my covers, I’ll probably have to end up drilling the holes in them. Or I might splurge on one of these, which looks like it can also be used on leather (which is something on my list for a future First Time Make.)
Next, about how to do it:
- Jody Alexander’s Creativebug class on Coptic Binding is outstanding. (Note: This First Time Make series is making my Creativebug membership – which was sorely underused, though there are loads of classes on there that I want to take – totally worthwhile!)
- This video by Sea Lemon is what I watched when it was time to start stitching. I’m going to spend a lot of time in her YouTube channel in coming weeks!
- I got some vague ideas and familiarity from this tutorial.
- And I almost decided to do a stab binding following this tutorial, but by then I was already hooked on doing a coptic binding.
- A day late, I just got the book How to Make Books, by Esther K. Smith, on the enthusiastic recommendation of Franklin Habit. There’s a whole chapter on coptic stitching. I’m in love with this book after flipping through it just once.
And finally, I think the only thing I mentioned in the scope that wasn’t specifically about bookbinding was the Daily Making Jumpstart, which you can sign up for right over here. I hope to see you in there!
Join me every week(ish) as I make stuff for the first time. Follow me on Periscope to be alerted when a broadcast begins, and on Instagram and Twitter for some advance notice!
If there’s something you want me to make for the first time, leave a comment and I’ll add it to my list!


