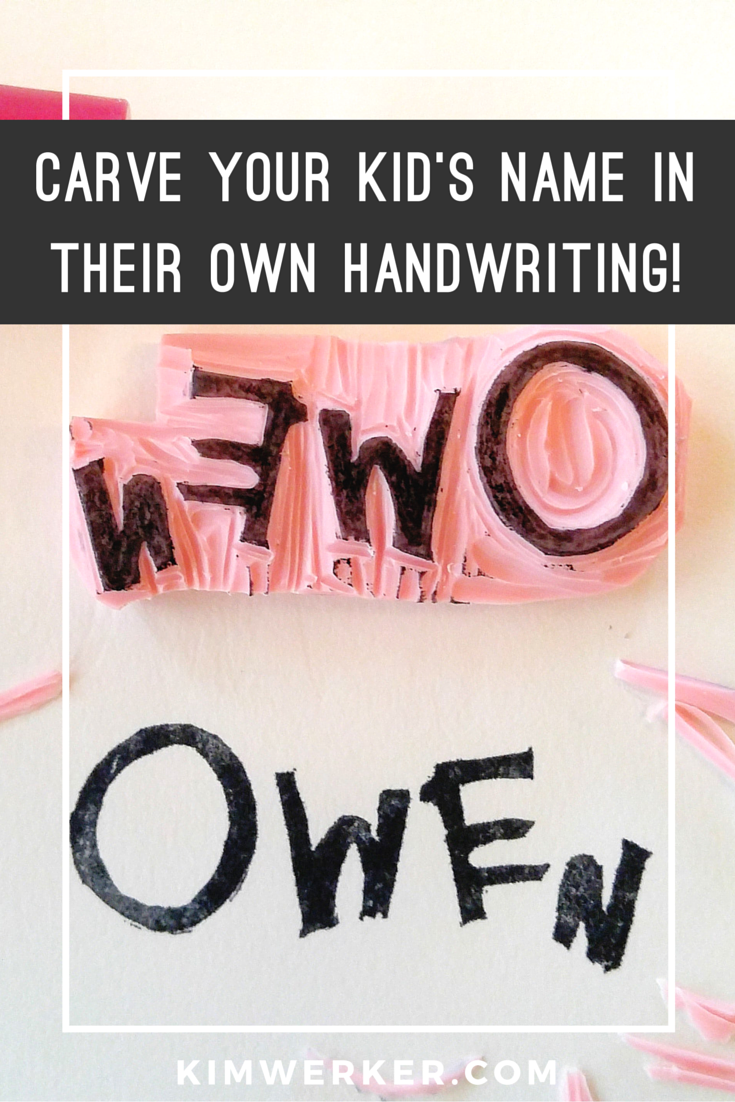
Valentine’s Day with a kindergartener. Gimme a break. Here’s how it was, two days before the class party:
I was staring down the fight I was going to have with my five-year-old about filling out valentines for every single kid in his class. In a stroke of genius, I had at least thought to buy a printable that only had a From: field and no To: field. But the kid was still going to have to write his name twenty-one times, in a tiny tiny space. My husband half joked that I should carve a stamp of his signature, and I was like, YES. I will carve a stamp of my kid’s name, just as he writes it in his wonky five-year-old hand, and then he can go to town stamping it all over the damn place.
As the universe so often does in the face of parental genius, it stuck it to me by having my son react with total glee at the prospect of writing his name twenty-one times. The kid happily sat for half an hour and did just that, and then went back and spent another half an hour writing a classmate’s name on the back of each valentine, such was his eagerness to participate in this ridiculous and increasingly out-of-control annual tradition.
But I had gotten it into my head to make a stamp of his name in his own handwriting, so as he wrote away, I did just that. Here’s how you can do this, too, so your kid can have some fun “signing” their name, and it’d be a pretty cool thing to keep for posterity, too, eh?
Tools and Materials
(Some of these are affiliate links.)
- Piece of paper
- Pencil
- Rubber or other kind of stamp-carving medium. My preference by far is the pink Speedball Speedy Carve kind.
- Lino cutter
- Craft knife
- Stamp pad (I love these)
How to Make a Stamp of Your Kid’s Name
Step 1: Have your kid write their name. Have them use a thick(ish) marker so you won’t have to struggle with fine lines when you carve the stamp. I drew a rectangle for him to write in, to constrain the size. (He felt his first attempted O was too big for the other letters to fit…)

Step 2: Using a pencil, first outline then colour in the letters. Go heavy on the pencil. This will allow you to do the next step.
Step 3: Place the paper on top of the rubber, hold it firmly in place with your fingers, and use a flat object to rub it (I used the side of the pencil). This will transfer the pencil markings onto the rubber (in reverse – you need to carve a word backwards into a stamp so it shows up forwards when you apply it).

Step 4: Use a pencil or a ballpoint pen to outline the transferred letters so they’re clear and distinct.

Step 5: Fill in the letters so it’s blatantly obvious that you won’t be carving there – you’ll carve around the letters.

Step 6: Using the finest point carving nib you have, carve an outline around the outside of the letters (and the inside of any letters that have negative space, like the O featured here). Proceed to carve around the letters, using a larger nib so it doesn’t get tedious, and use a craft knife as needed to cut away excess rubber.

Step 7 (optional):Â Mount the stamp on a piece of wood to make using it easier and less messy.

Now go to town! Or, rather, let your kid go to town stamping their name all over the place!


Love this Kim. Really a marvelous keepsake too. He’s so big to be able to want to write his name out all those times!